Research Methods for Global Studies II (GLO1221)

Teaching material for Quantitative Methods track in Semester 1
Tutorial 1
Tutorial Summary:
- Setup a Python environment (Anaconda/Colab) on your computer
- Learn the basics of taking notes in python notebooks
- Run some basic code
- Save your notebook
First we need to setup python programming for your computer. There are two ways we can do this, either we install Anaconda or use Google Colab.
Google Colab is easier to setup, but requires an internet connection whenever you use it (and that the Colab service is available). Anaconda runs on your machine and does not need an internet connection (after it is installed). For this reason Anaconda may be more convenient and tends to run faster.
Install Anaconda
First we need to install Anaconda to setup the python programming language and jupyter notebooks on your computer.
- Click this link to go to the downloads page.
- Download the installer for your operating system:
- For Windows choose the 64-bit graphical installer
- For Mac you need to see if you have an intel or M1 processor. Follow these instructions:
- If the processor is Intel, then use the regular Mac 64-bit graphical installer.
- If the processor is M1, then use the Mac 64-bit (M1) graphical installer.
- For chromebook (or Mac with M2 processor) you cannot install Anaconda. Instead follow the setup Google Colab instructions below.
- For linux, you can probably figure it out…
- Run the installer and follow the instructions.
Setup Google Colab
- Go to the Google Colab webpage https://colab.research.google.com/.
- Click on
Sign Inin the top right corner of the page. - Login with your Google account or create an account if you do not already have one.
Create your first notebook
For Anaconda:
- Launch the Anaconda navigator platform
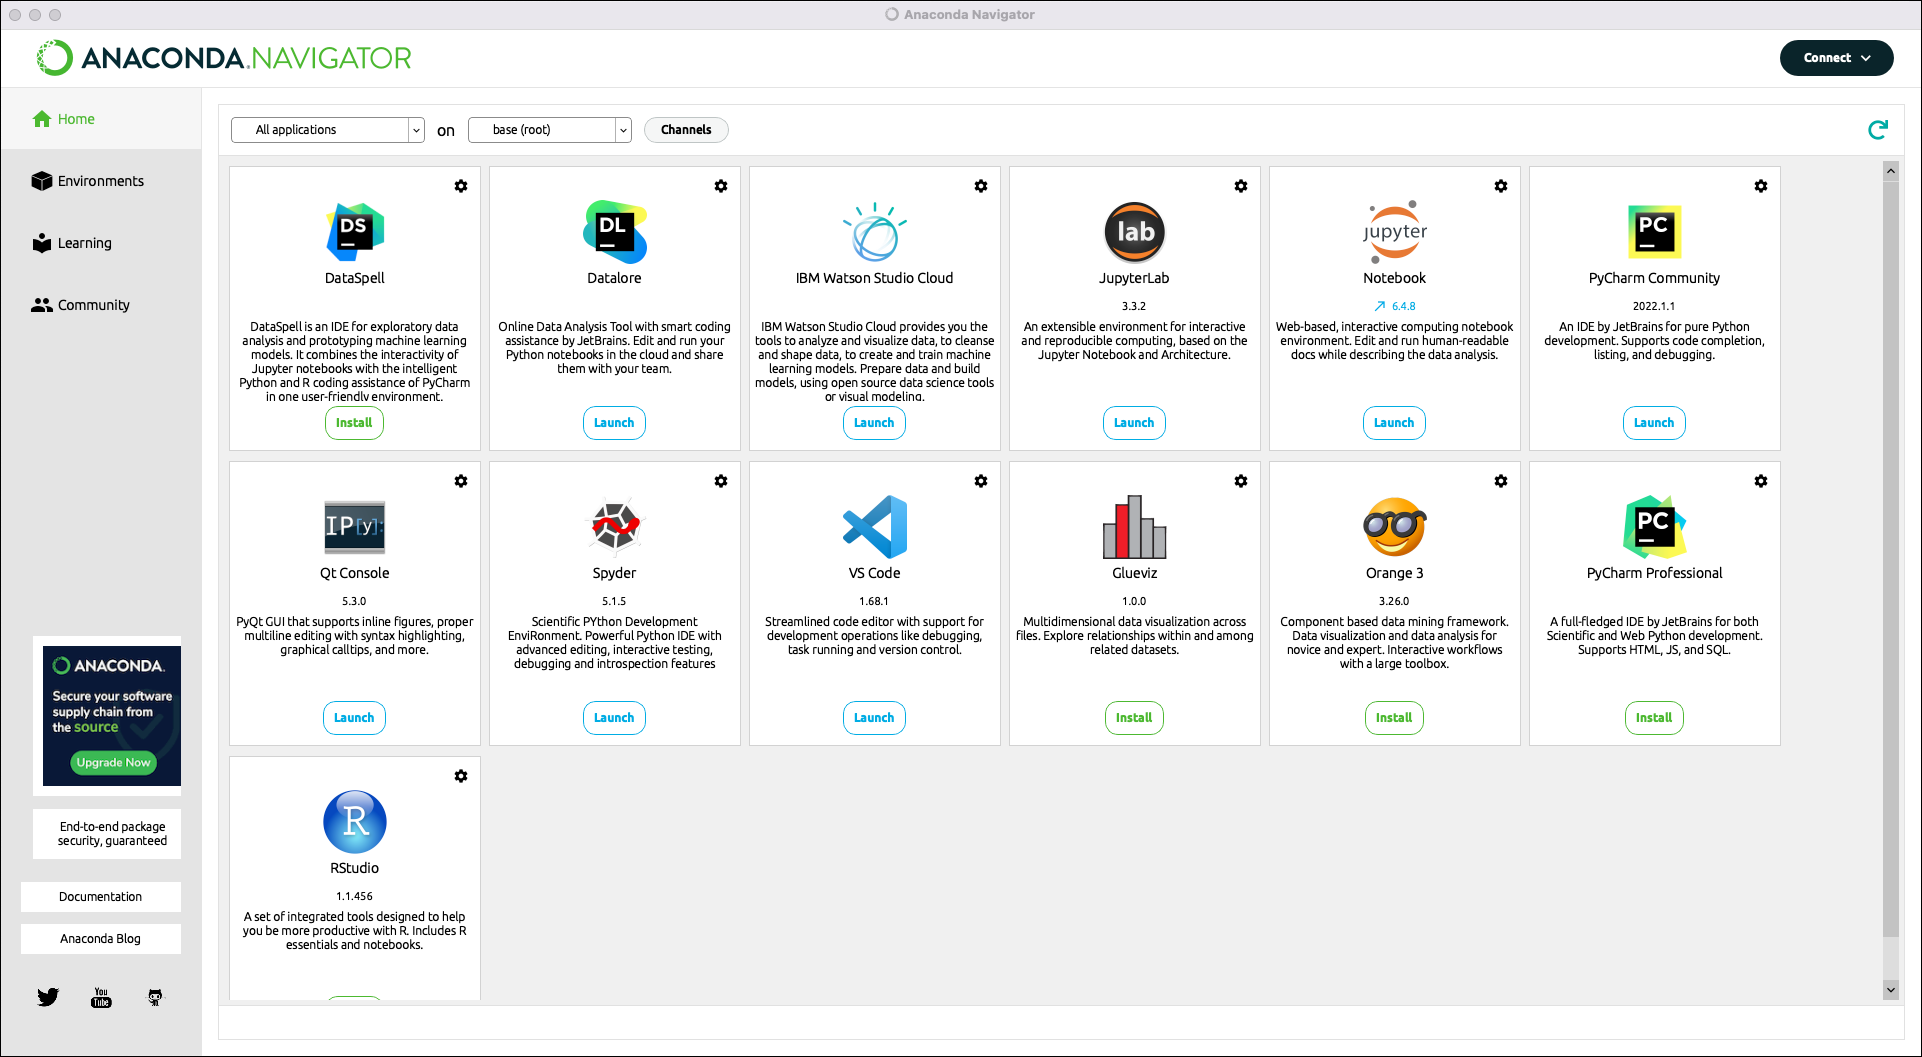
- Scroll through the options and click on the JupyterLab button
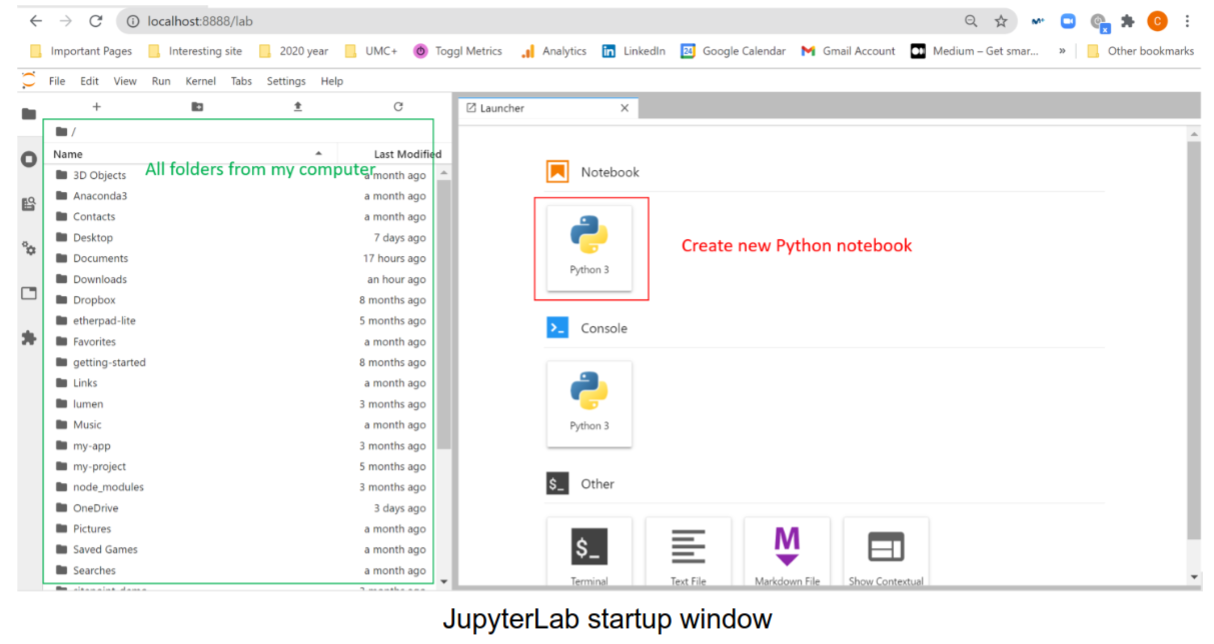
- After clicking on JupyterLab, your browser should automatically launch and display a new tab
with the JupyterLab interface.
For Colab:
- Open your web browser and go to the Colab webpage https://colab.research.google.com/.
- Click on
Sign Inin the top right corner of the page and login. - Open a new notebook from the menu
File->New notebook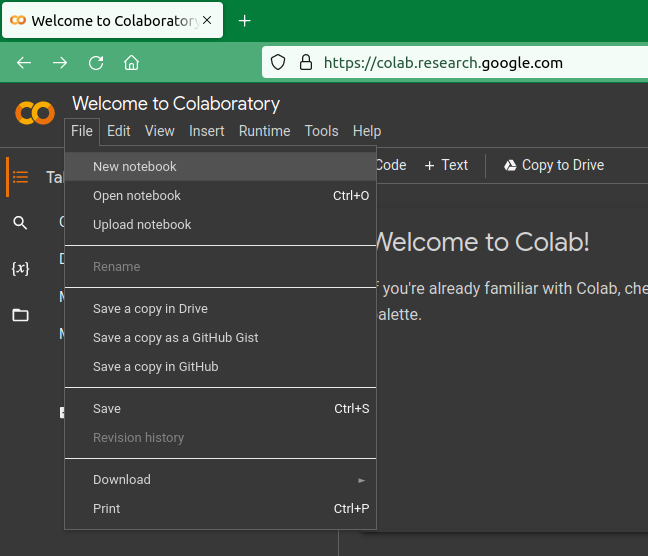
Start taking notes!
A notebook is called a “notebook” because you can use it as an electronic notebook to take notes. Before we start coding, let’s try that out…
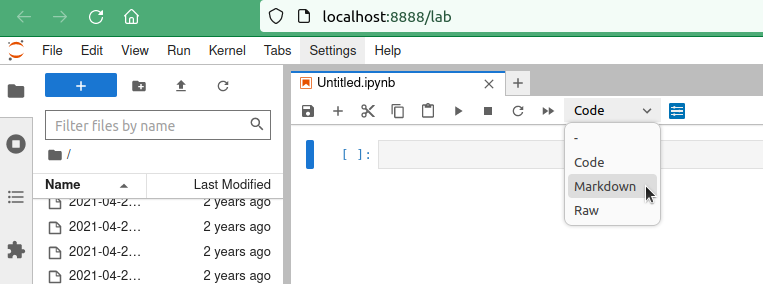
First we tell the notebook that you want to input text instead of code. Select the box where it says Code and change it to Markdown1 (This is slightly different in Colab. Instead of Markdown you need to select Text).
You can now write text here in the cell. You can format the text to be bold, italic, headings, lists etc. To do this we type in something called “markdown”
For example, you can type this input:
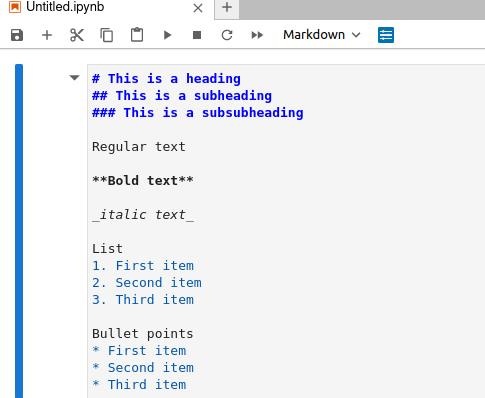
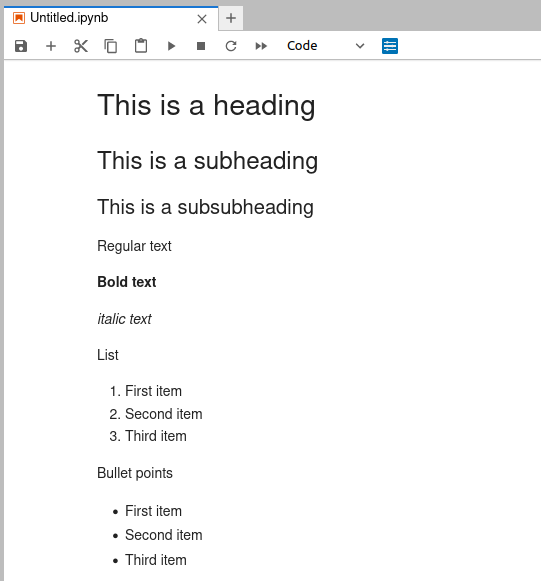
and “run” the cell by pressing Shift + Enter to produce this output:
Exercise 1: Try making some notes yourself. Write a todo list (either ordered or bullets) and highlight important items using bold or italic. Include a heading.
You can see some other examples here.
Write some code
Now you are ready to write some code.
Exercise 2: Below the text you wrote there should be a new cell. Enter the text print("hello world") and run the cell (make sure you have changed back to Code instead of Markdown)
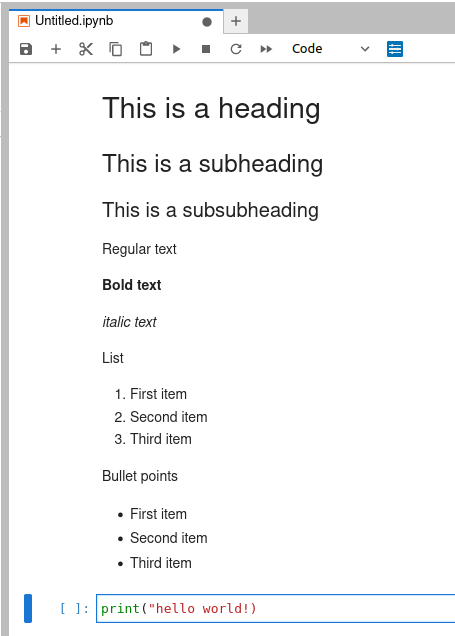
What is the output?
Look back over the lecture slides and try to describe the different parts of the code.
You can also perform calculations using arithmetic operations, i.e., addition +, subtraction -, multiplication * and division /.
Exercise 3: Using the lecture slides, try to do the following (each in its own code cell):
- Subtract 913 from 57811
- Multiply 23 by 745
- Divide 1956 by 3
Arithmetic operations also work sometimes on non-numeric data. For example, we can tell python that some data is text by using quotation marks " or '
Exercise 4: Try the following operations with text:
- Add “hello” to “world!”
- Multiply “hello” by 2
- “hello” plus 1
- “hello” minus 1
Can you explain the output? Note that some of the above may produce an error!
Try inserting Markdown cells between the code cells and enter your explanation for each
Exercise 5: Saying “Hello world” seems a little impersonal. Get python to greet you personally with the following code:
name = input("What is your name?")
print("Hello " + name)
Remember to save your work!
It is important to save your notebook so that you can come back to it later.
Exercise 6: First give your notebook a meaningful name.
-
Right click at the top where it says
Untitiled.ipynb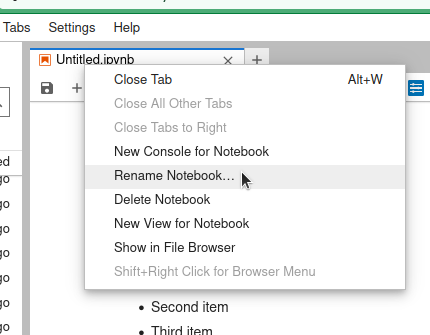
-
Change the name of the notebook to something meaningful like
My_first_Notebook.ipynborTutorial1.ipynband clickRename. Make sure that you do not include spaces and do not delete the.ipynbat the end.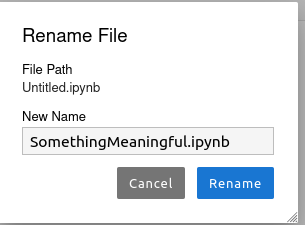
-
Press
Ctrl+Sto save the notebook.
Now can you find where this file is stored on your computer?
Convert your notebook to HTML/PDF
To submit your work each week to Canvas you need to convert the file to a format that we can read in Canvas. To find out how to do this, follow the instructions on preparing submissions.
Endnote
Finally, type import antigravity into a code cell and run it.
Now you are flying with Python.
-
Markdown is a way to format text using only plain text that the computer can interpret as formatting instructions. Not only does this work in notebooks, but you can also write webpages this way. (This page is written in Markdown!) ↩