Research Methods for Global Studies II (GLO1221)

Teaching material for Quantitative Methods track in Semester 1
Tutorial 1
Tutorial 2
Tutorial 3
Tutorial 4
Tutorial 5
Tutorial 6
Tutorial 7
Tutorial 8
Tutorial 3
Tutorial Summary:
- Recap of variables in Python programming
- Learn what modules are and how to import them
- Perform different actions using conditional statements
In this tutorial we are going to create a simple interactive game of Rock, Paper, Scissors. We’ll recap and extend some of the concepts from the last tutorial and introduce some new concepts such as importing modules and visualisation.
Variables (recap)
From the last tutorial, recall that variables have names and store data values. Variables are created when a value is assigned to it. We assign a value to a variable using the = symbol. The value on the right is assigned to the variable on the left.
variable_name = data_value
Variables must be created before they are used. If we try to use a variable before assigning a value, then Python will give us an error message. For example:
city = "Maastricht"
print(city)
print(country)
continent = "Europe"
print(Continent)
country = "The Netherlands"
---------------------------------------------------------------------------
NameError                                 Traceback (most recent call last)
/tmp/ipykernel_80627/3477179379.py in <module>
      1 city = "Maastricht"
      2 print(city)
----> 3 print(country)
      4 continent = "Europe"
      5 print(Continent)

NameError: name 'country' is not defined
Error messages can look confusing at first glance, but they can help us understand what went wrong. It is important to try and understand error messages because you will see a lot of them! (Even experienced computer programmers get a lot of error messages.)
Exercise 1: Copy the code above into your notebook and run it to replicate the error message for yourself. Look carefully at the error message. What clues does the error message give about what went wrong? (What type of error? Where did the error occur? etc.)
Exercise 2: Correct the error that you identified. Is there another issue with the code? What is it?
Always remember that the order matters in Python. This also includes the order in which you run cells in your notebook!
Rock paper scissors (part 1)
We can use variables to start writing the code for our game of Rock, Paper, Scissors.
computer_selection = "Rock"
user_selection = input("Select: Rock, Paper, or Scissors")
Exercise 3: In your notebook add a line of code to display the two selections using the print() function and F-strings.
Remember F-strings have an f before the quotation marks, e.g.,
f"Some text to display {variable_name}"
if you need a reminder, then check the previous tutorial.
Importing modules
Last time we considered the idea of functions as pre-built tools that we may want to use in our code. Sometimes there are functions that exist but are not in the standard Python environment. To access other functions we need to import the module that contains them.
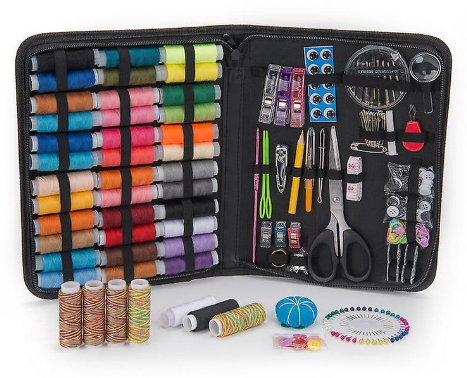
We can think of modules as being sets of related tools…
 |
 |
|---|---|
import SewingKit |
import PencilCase |
 |
 |
import MechanicalToolkit |
import Powertools |
For example, if you wanted to draw a picture but you didn’t have coloured pens, then you would need to go and get your pencil case. If PencilCase was a Python module, then we’d need to import PencilCase before we could use it.
Note that we only need to import a module once in a session. Much like a real pencil case, we only need to go and get it once and all the pens in the pencil case are available, until we put the pencil case back away.
For example, we can import the random module to access functions related to generating random numbers and choices:
import random

# Generate a random integer between 1 and 10
random_number = random.randint(1, 10)
print(f"Random number: {random_number}")

# Select a random snack
random_snack = random.choice(["chocolate", "apple", "cake"])
print(f"Random snack: {random_snack}")
Above, we see two examples of functions from the random module: randint and choice. Notice that when we run the function from a module, we need to tell python in which module the function can be found. We tell Python where to find a function using module_name.function_name()
Sometimes modules are organised into sub-modules, particularly when they are large modules… Imagine we have a really big stationary box organised into sections. If we want a red pencil then we will find it in the pencils section in the stationary box.
 |
 |
 |
|---|---|---|
BigStationaryBox.Pencils.RedPencil() |
||
| the RedPencil function is in the Pencils sub-module of the BigStationaryBox module |
The matplotlib module contains functions for drawing and plotting graphs and contains a sub-module that is also called pyplot in which we can find a function plot() to plot some data points in a graph.
import matplotlib.pyplot

# Data
x = [1, 2, 3, 4, 5]
y = [2, 4, 6, 8, 10]

# Create a simple line plot
matplotlib.pyplot.plot(x, y)
Again, this is all about telling Python where to find the function. We could have sub-sub-modules and sub-sub-sub-modules, e.g., module.submodule.subsubmodule.function()
Rock paper scissors (part 2)
So far the game is very easy to win because the computer always plays the same choice and you can see that choice.
Exercise 4: Create a new version of the game in which the computer_selection is chosen randomly from the possible options ["Rock", "Paper", or "Scissors"]
Conditional statements
In Python, if statements are used to make decisions in your code based on certain conditions. They allow you to execute different blocks of code depending on whether a condition is True or False. Here’s a very basic introduction to if statements:
# Simple if statement
age = 19

if age > 18:
    print("age is greater than 18")  # Run the indented lines when
    print("you can have a beer")     # the condition is True
In this example:
- We define a variable
ageand assign it the value19. - We use an
ifstatement to check ifageis greater than18. - If the condition (
age > 18) isTrue, the indented block of code following theifstatement is executed.
To evaluate if a condition is True or False we use conditional operators:
| Operator | Description | Example | Result |
|---|---|---|---|
== |
Equal to | 5 == 5 |
True |
!= |
Not equal to | 5 != 3 |
True |
< |
Less than | 3 < 5 |
True |
> |
Greater than | 5 > 3 |
True |
<= |
Less than or equal to | 3 <= 5 |
True |
>= |
Greater than or equal to | 5 >= 5 |
True |
Sometimes we want Python to do something else if a condition is False. To do this we use an if-else statement:
# if-else statement
age = 17

if age > 18:
    print("age is greater than 18")
    print("you can have a beer")
else:
    print("age is not greater than 18")  # Run these indented lines when
    print("you cannot have a beer")      # the condition is False
In this example:
- We define a variable
ageand assign it the value17. - We use an
ifstatement to check ifageis greater than18. - If the condition (
age > 18) isTrue, it executes the code block underif. Otherwise, it executes the code block underelse.
Exercise 5: What happens when age = 18? Is this the correct outcome? How could you correct the code?
Sometimes we want to test a sequence of conditions. Then we can nest if statements by including another if-else statement within an if block or an else block.
For example, you want to check people are old enough to buy beer. However, you only want to ask for ID if they are close to the legal age.
age = int(input("What is your age:"))

if age > 25:
    print("You can have beer")
else:
    print("You need to show ID")
    if age > 18:
        print("You can have beer")
    else:
        print("You are not old enough for beer")
Nesting if statements can get a bit messy. An alternative is to use elif, which simply means else if. We can re-write the above code using an elif statement:
age = int(input("What is your age:"))

if age > 25:
    print("You can have beer")
elif age > 18:
    print("You need to show ID")
    print("You can have beer")
else:
    print("You need to show ID")
    print("You are not old enough for beer")
Exercise 6: Try the above code in your notebook. Confirm that both give the same answer. How does the operation of the code change if you change the order of the conditions, e.g., swap the 18 and 25?
Rock paper scissors (part 3)
It would be nice for our game of Rock, Paper, Scissors to tell the user who has won the round. We can do this with conditional statements.
Exercise 7: Use conditional statements to update your code to correctly determine the result of the round of Rock, Paper, Scissors (win/lose/draw).
 |
 |
 |
|---|---|---|
| Rock, Paper, Scissors, Toaster, Freezer, Bread1 |
-
from xkcd licensed under CC BY-NC 2.5 ↩